Step by Step Solar Panel Installation Guide from Experts
Installing solar panels is a streamlined process that, when broken down into five distinct steps, can be effectively managed to guarantee both efficiency and compliance. Beginning with a thorough assessment of your energy needs and evaluating the available roof space is the first critical step.
This is followed by securing the necessary permits to meet regulatory standards. Site preparation, including roof inspection and potential electrical upgrades, sets the stage for a successful installation. Mounting the panels for ideal sunlight exposure is key, and finally, connecting and testing the system guarantees peak performance.
Curious about mastering these steps? Keep on reading!
Assess Your Energy Needs
To accurately assess your energy needs, begin by calculating your average monthly energy consumption, taking into account any seasonal variations that may affect usage. This step is essential for determining the appropriate size of your solar panel system.
Analyze your electricity bills over the past year to identify patterns in energy usage, noting peak months and times of reduced consumption.
Next, evaluate your roof space and orientation to understand the potential for maximum energy production. The amount of roof space available will directly influence the number of solar panels that can be installed. South-facing roofs generally yield the highest energy output, but east and west orientations can also be effective.
It’s important to factor in any future energy needs or expansions when sizing your solar panel system. Anticipate any increased energy consumption, such as adding electric vehicles or expanding your home, to ensure your system remains efficient over time.
Consulting with a solar energy expert can provide valuable insights and recommendations. They can assess your specific energy needs, roof space, and guide you towards the right system size for maximum efficiency and sustainability.
Secure Necessary Permits
Obtaining the necessary permits for solar panel installation is a critical step to guarantee compliance with local building codes and safety regulations. The permitting process involves submitting detailed documentation and plans to local authorities for review and approval.
This documentation typically includes site plans, electrical diagrams, and specifications of the solar panel system. Ensuring that these documents are precise and thorough can greatly streamline the approval process.
Compliance with building codes and safety regulations is paramount, as failure to obtain the appropriate permits can result in substantial fines, project delays, or even the mandatory removal of the installed solar panels.
Each locality may have its own unique permitting requirements, making it essential to research and understand the specific regulations in your area.
Engaging a professional installer can be highly beneficial, as they are well-versed in the permitting process and can efficiently navigate the complexities involved. Professional installers often have established relationships with local authorities, which can expedite the approval process and ensure that all necessary permits are secured without incident.
Prepare Installation Site
Evaluating the installation site starts with a thorough review of your home’s roof condition, confirming structural integrity and sufficient space for solar panel placement. Begin by evaluating the roof condition to verify it can support the added weight of the solar panels and withstand environmental elements. Structural integrity is crucial to avoid future complications.
Next, identify any potential shading issues that could impede the efficiency of your solar panel installation. This includes examining nearby trees, buildings, and other structures that could cast shadows on your panels, reducing their effectiveness.
The orientation of the roof plays a crucial role; ideally, it should face south to ensure optimal sunlight exposure throughout the day.
Simultaneously, consider any necessary electrical panel upgrades that may be required. The existing electrical panel must be capable of handling the additional load from the solar panel system. It’s important to consult with a licensed electrician for this evaluation.
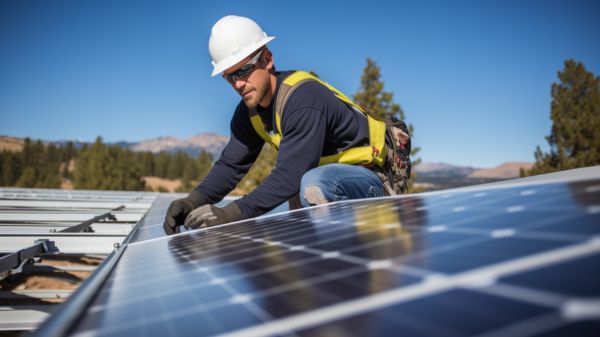
Mount the Solar Panels
After confirming the installation site is well-prepared and all potential issues have been addressed, proceed to securely mount the solar panels on the roof using high-quality racking systems engineered for durability and stability. Following manufacturer instructions is crucial to achieve ideal panel placement, maximizing sunlight exposure and energy production.
When mounting the solar panels, it is vital to account for various environmental factors such as wind, rain, and potential shading. Ensure the panels are securely fastened to the racking system to prevent any damage from adverse weather conditions. Using appropriate tools and equipment is paramount for a safe installation process.
Consider the following key points to guarantee an effective installation:
- Roof Orientation: Position panels to capture maximum sunlight throughout the day.
- Shading: Avoid placing panels in shaded areas to prevent energy production loss.
- Structural Integrity: Verify the roof can support the additional weight of the solar panels and racking system.
- Racking System Compatibility: Ensure the racking system is compatible with the roof type and solar panel model.
- Secure Fastening: Utilize appropriate fasteners and techniques to ensure panels remain securely in place under various environmental conditions.
Connect and Test System
To guarantee efficient energy conversion, start by connecting the solar panels to the inverter, paying close attention to proper wiring and secure connections. Make sure that all wiring adheres to electrical codes and guidelines to prevent any potential issues. Utilizing the correct gauge wire is essential to handle the specific voltage output from the solar panels.
During the testing phase, verify that the system functions correctly by checking the voltage output. Utilize a multimeter to measure the voltage and ensure it aligns with the expected levels. Monitoring the energy production levels will provide insights into the system’s efficiency and performance.
Inspect all electrical connections thoroughly to confirm they are secure and intact. Any loose or improperly connected wiring can lead to inefficiencies or potential hazards. Adherence to safety protocols is critical; always use insulated tools and wear appropriate protective gear during this phase.
Conduct a thorough inspection of the entire system, including mounting hardware, connectors, and the inverter itself, to identify any issues or areas needing adjustment. Confirm that the system is generating electricity as anticipated before deeming the installation process complete. This final verification step ensures the long-term reliability and efficiency of your solar power system.
Conclusion
Installing solar panels involves critical procedures to guarantee peak functionality and efficiency.
Evaluating energy requirements and assessing roof space is the initial step. Securing permits and adhering to regulations is necessary before installation commences.
Site preparation, including roof condition and electrical system upgrades, is crucial. Properly mounting the panels to maximize sunlight exposure and correctly connecting the system are essential steps.
Finally, system testing verifies performance, ensuring the solar panels are ready to generate clean energy effectively.
3 Comments
Comments are closed.